In this example, we configure and run both a Modbus TCP slave and a Modbus RTU slave on the RevPi Connect+ with CODESYS Control for Linux ARM/ARM64. The application is designed to copy the first 10 holding registers to the 10 input registers of both slaves.
Prerequisites #
Hardware #
✓ RevPi Connect+
✓ One Modbus TCP slave
✓ One Modbus RTU slave
For detailed instructions about how to set up your system, see Getting Started.
Software #
✓ CODESYS Development System installed on your PC
To ensure a compatible system with suitable software, see Software Compatibility.
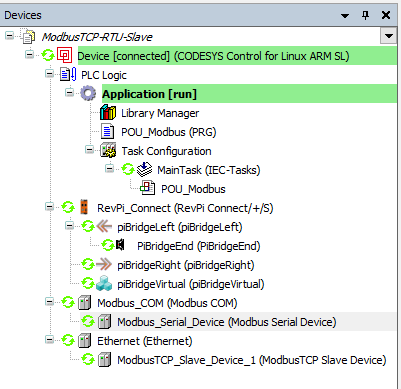
Overview #
The following figure provides an overview of the CODESYS device tree for the setup:
Adapting for RevPi Core or RevPi Compact
▷ Open the context menu of RevPi Connect in the CODESYS device tree.
▷ Select Update device.
▷ Choose RevPi Core or RevPi Compact as the replacement and rename the device accordingly.
Step 1: Configuring Modbus RTU Serial Port #
For RevPi Connect or RevPi Core
▷ Edit the configuration file:
sudo nano /etc/CODESYSControl_User▷ Add the following line:
[SysCom]
Linux.Devicefile=/dev/ttyUSB
▷ Map the COM ports in CODESYS as follows:
-
/dev/ttyUSB0→ COM port 1 -
/dev/ttyUSB1→ COM port 2 -
/dev/ttyUSBn→ COM port n
If an extra USB-485 converter is connected, the correct COM port has to be identified.
For RevPi Compact:
▷ Edit /etc/CODESYSControl_User for the default RS485 Port and add:
   [SysCom]
   Linux.Devicefile=/dev/ttyAMA
▷ Add the following line instead for using USB-485 converter:
   [SysCom]
   Linux.Devicefile=/dev/ttyUSB
Step2: Configuring Modbus RTU Slave #
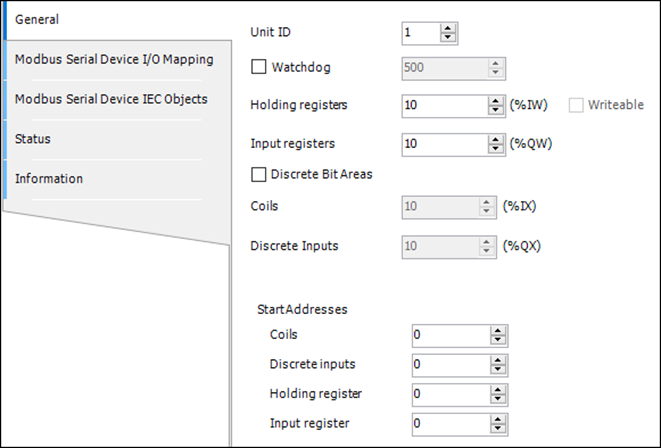
▷ Map Holding Registers and Input Registers to the application POU_Modbus to make the data accessible to the application logic.

Step 3: Configuring Modbus TCP Slave #
The configuration for the Modbus TCP slave is similar to that for the Modbus RTU slave.
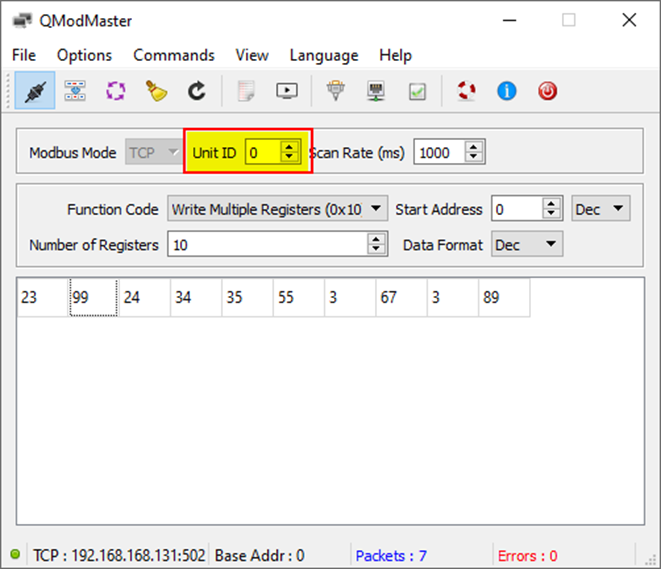
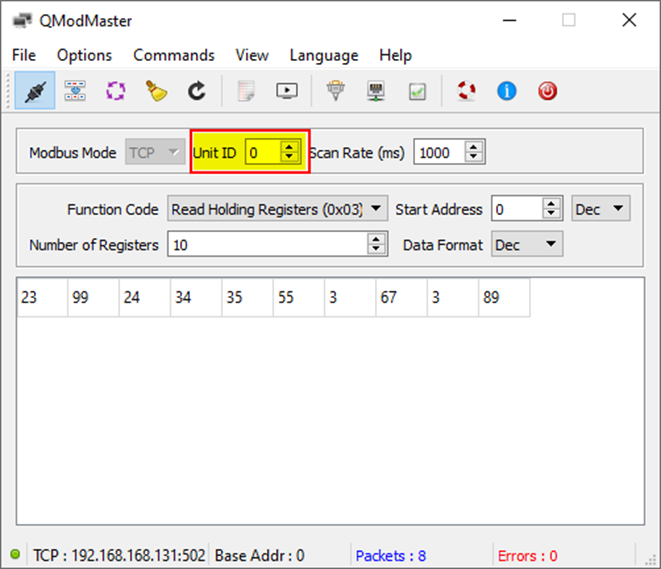
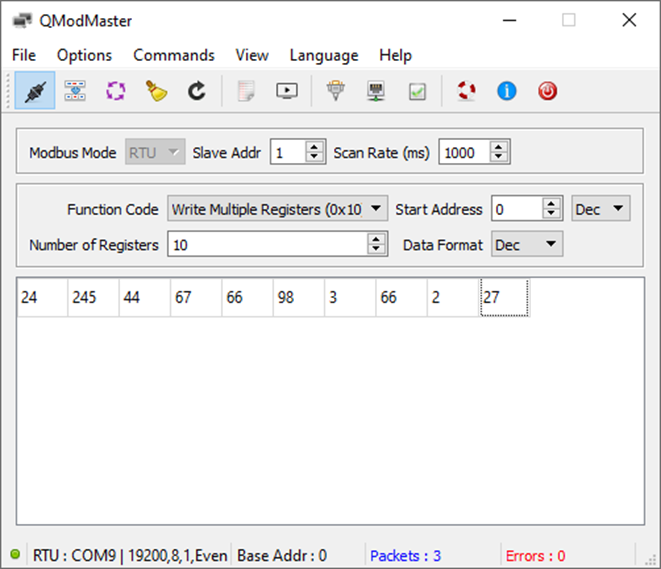
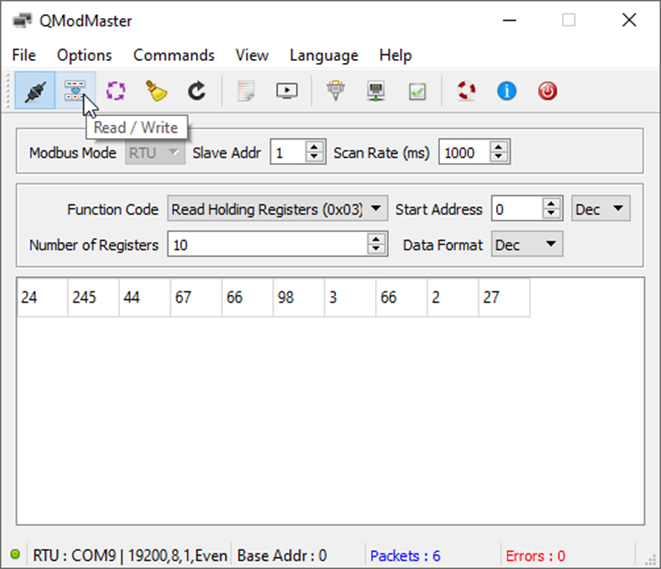
Step 4: Simulating Modbus TCP and RTU Masters #
▷ Use the application QModMaster for simulation.
You can download it here.
Write Multiple Registers: Writes data to the holding registers of the slave.
Read Holding Registers: Reads back the input register data of the Modbus TCP/RTU slave running on the RevPi device.
Step 5: Modbus TCP Unit ID #
-
The Modbus TCP Unit ID serves the same function as the slave ID.
-
The Unit ID
255is recommended for addressing the gateway itself. -
When using QModMaster, note that it uses Unit ID
0instead of255for addressing the gateway.