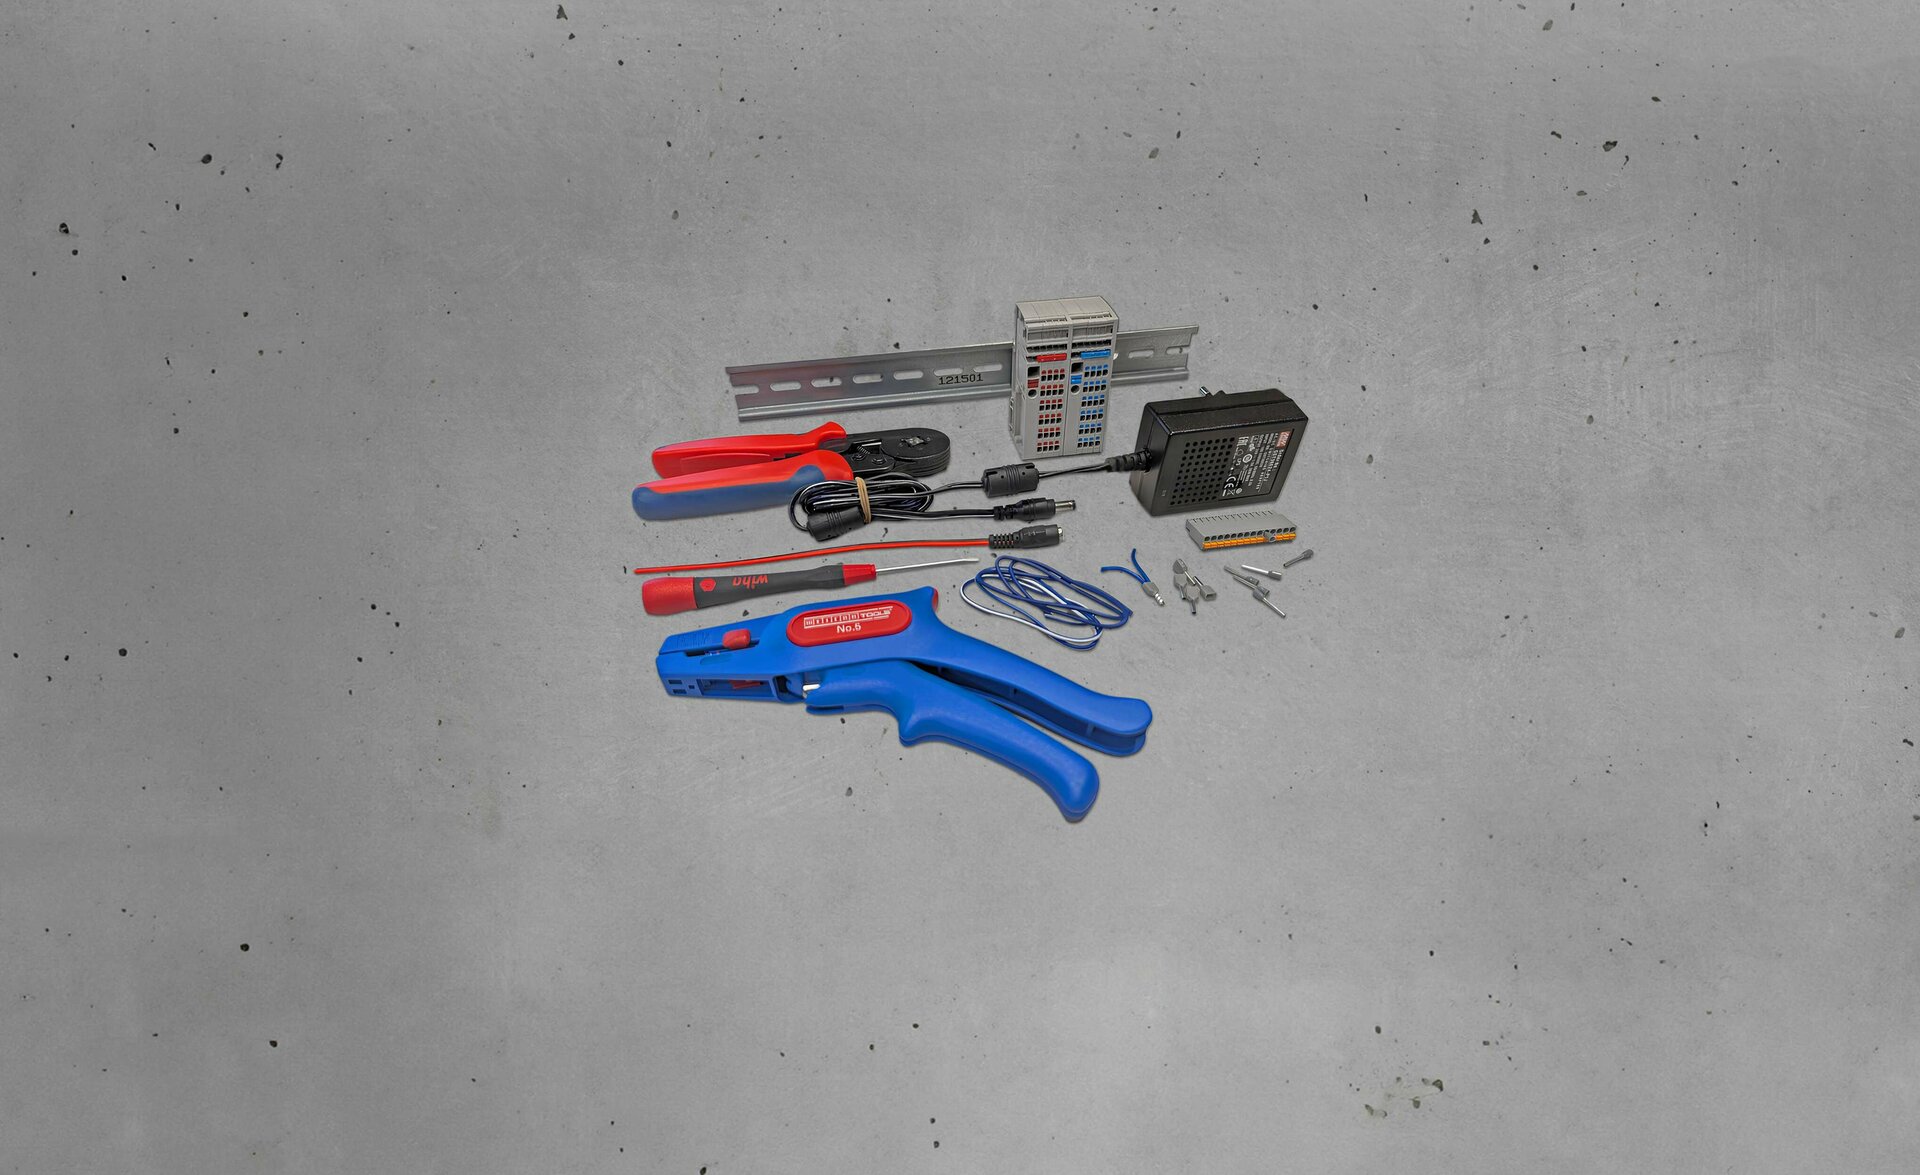
Prototyping with Revolution Pi: What You'll Need
Setting Up Power Supply
Before Revolution Pis are installed in the control cabinet, they usually end up on a desk for prototyping.
Find out how to safely power your Industrial Raspberry Pi (RevPi) at your workplace and get started quickly.
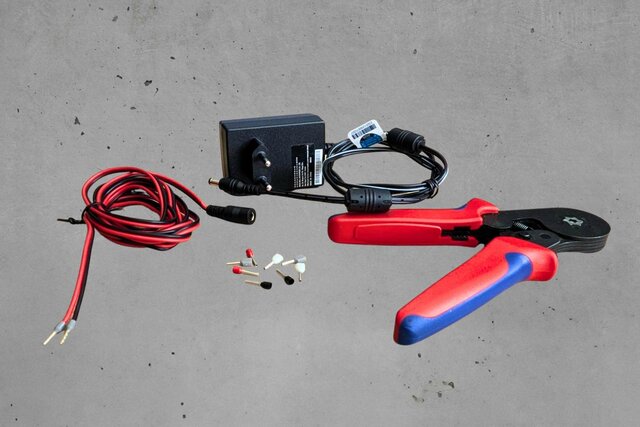
Here’s What You’ll Need:
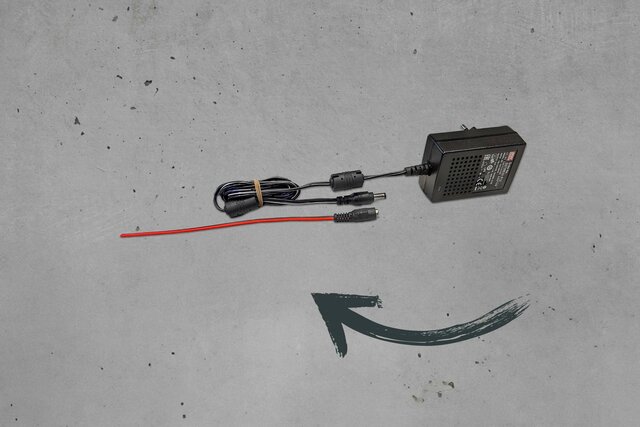
Power Supply for the Workstation
For safety reasons, you must not use power supplies for DIN rails at your workplace. We therefore recommend the following equipment:
Plug-in power supply
- Input voltage: 100–240 V AC
- Output voltage: 24 V DC
- e.g. Mean Well GST36E24-P1J or comparable
Note on power output:
Choose a power supply unit whose power output is designed for the power requirements of your entire system (base module, expansion modules, and connected sensors and actuators).
DC Cable Socket
- A cable with a barrel connector on one side and two open cable strands on the other.
- This is used to connect your plug-in power supply to your Revolution Pi – via the screw terminals of the X4 connector (RevPi Connect and RevPi Core).
Note: You should first fit ferrules to the open cable ends (more on this below).
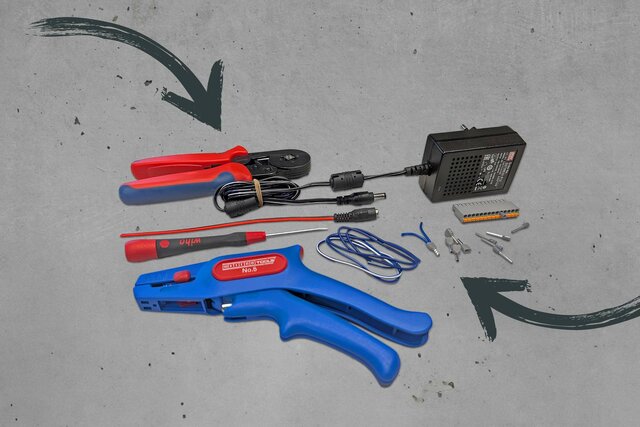
Tools & Materials for Cabling
Cable
- PVC stranded wire, 0.5 mm² cable cross-section
Ferrules
- Power supply for the base module:
- Standard ferrules: 0.5 mm² partially insulated, 8 mm long
- Power supply for the expansion modules:
- Twin ferrules: 0.5 mm² partially insulated, 8 mm long
- Connection of sensors and actuators (for I/O modules with 14-pin connector):
- Long ferrules: 0.5 mm² partially insulated, 12 mm long
Tools
- Wire stripper
- Crimping pliers for ferrules
- Screwdriver
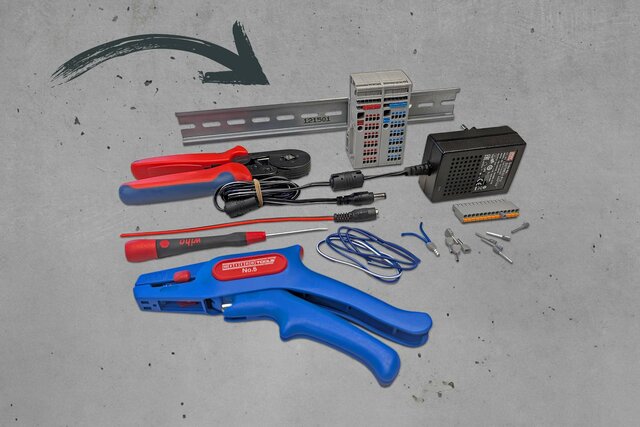
DIN Rail for Mounting (Optional)
DIN rail
If you use expansion modules, it makes your work easier to attach your Revolution Pi system to a DIN rail.
Note on ventilation:
Please note that the devices are only 100% efficient if the ventilation slots are unobstructed and the device is mounted vertically. (learn more)
Distribution terminal block
This allows you to distribute the 24 V voltage from the power supply to multiple outputs.
This is helpful if you want to supply the base module and expansion modules from one single source.
- e.g., Weidmüller 2506380000 or comparable
Attaching Ferrules
Crimping: For Reliable Contact
When “crimping,” you permanently connect the ferrule to the end of the cable. Here's how to do it:
- Remove the cable insulation to the required length using wire strippers.
- Slide the ferrule over the stripped end of the cable.
- Use crimping pliers to press the ferrule tightly together – done!
The ferrule protects the fine wires and ensures a secure contact in the screw terminals.
Connecting Expansion Modules
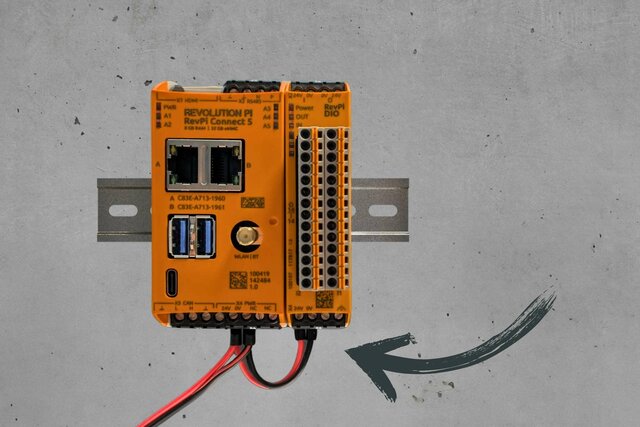
Power Supply for I/O Modules and Gateways
You can power your expansion modules from the same power source using twin ferrules via the X4 connector on your RevPi base module.
If you have more than one expansion module, run the power supply with twin ferrules from one module to the next.
Do you have space on your DIN rail? Then you can also use distribution terminal blocks. These allow you to conveniently supply all modules with power.
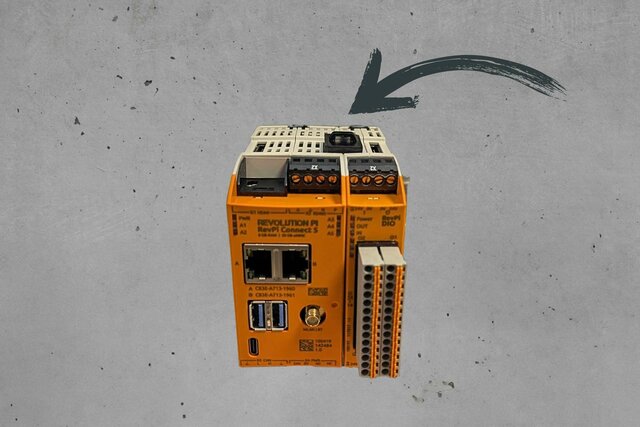
Data Connection via Plug and Play
To enable data exchange between the base module and expansion modules, use the PiBridge plug connector.
No tools are required. It is a simple plug-and-play system: plug it in, set up the I/Os in the configuration tool PiCtory, and you're done.
Each expansion module comes with a PiBridge.
Ready? Then Have Fun Developing!
With this basic equipment, you can safely power your Revolution Pi on your desk and start developing right away.
Checklist Prototyping material:
- Plug-in power supply, e.g. Mean Well GST36E24-P1J
- DC cable socket
- PVC stranded wire, 0.5 mm² cable cross-section
- Standard ferrules: 0.5 mm² partially insulated, 8 mm long
- Twin ferrules: 0.5 mm² partially insulated, 8 mm long
- Long ferrules: 0.5 mm² partially insulated, 12 mm long
- DIN rail (optional)
- Distribution terminal block, e.g. Weidmüller 2506380000 (optional)
- Wire strippers
- Crimping pliers for ferrules
- Screwdriver
Resources for the next steps:
- Technical Documentation: Getting Started
- Cockpit: Configuring Your RevPi
- PiCtory: Configuring Expansion Modules
- Tutorials
Do you have questions about commissioning? You can find support from the community and our experts in our forum.
More Blog Posts

Starting with RevPi Bookworm, you can use Cockpit to configure your Revolution Pi devices, monitor the system status, install updates with one click,…

The PiBridge has been mentioned many times before – but what exactly is its function? What makes this backplane bus so important for communication…
The number of your connected devices is growing, and you wonder how to manage all of them? We have you covered! Revolution Pi is now an official…